
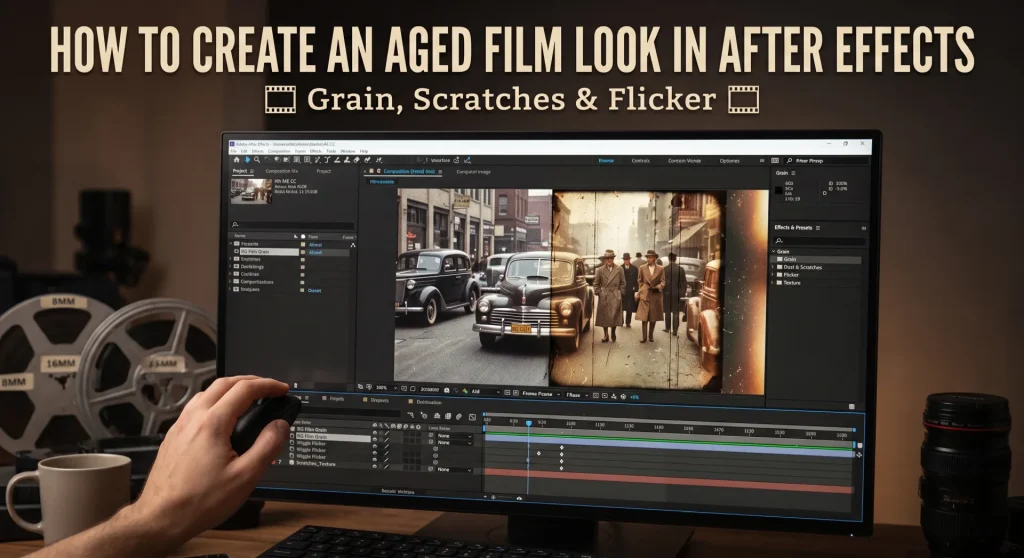
To create an aged film look in After Effects, combine faded color, moving grain, dust, scratches, flicker, subtle frame shake and reduced frame rate. Build the treatment with adjustment layers and native effects, then keep every setting restrained so the footage feels like old film rather than a heavy filter.
An aged film look can make modern footage feel nostalgic, handmade, historical or slightly unsettling. It works well for music videos, memory scenes, documentary segments, wedding films, fashion edits, title sequences and found-footage horror.
But old film is not just grain.
Real film has small imperfections that change from frame to frame. Color fades. Brightness flickers. Dust appears briefly. The frame shifts slightly in the gate. Scratches come and go. Motion may feel less smooth than modern digital video.
The best aged film effect combines a few of these details without making the footage hard to watch.
What Makes Footage Look Like Old Film?
A convincing old-film look is made from several visual layers.
| Film characteristic | What it changes | Why it matters |
|---|---|---|
| Faded color | Reduces clean digital color | Makes footage feel less modern |
| Film grain | Adds moving texture | Replaces overly clean digital surfaces |
| Dust and dirt | Adds temporary specks | Suggests physical film handling and projection |
| Scratches | Adds vertical marks | Suggests worn or damaged film stock |
| Flicker | Changes brightness unevenly | Mimics projector and exposure variation |
| Gate weave | Moves the frame slightly | Mimics mechanical film movement |
| Softness | Reduces digital sharpness | Makes footage feel less clinical |
| Vignette | Darkens corners | Adds lens or projection character |
| Lower frame rate | Reduces motion smoothness | Can suggest older cameras or home-movie film |
Do not use every element at maximum strength. The goal is to create believable texture, not hide the original video.
Before You Start
Start with footage that supports the look.
Aged film works best with:
- Outdoor scenes
- Portraits
- Family or lifestyle footage
- Travel footage
- Old buildings or natural locations
- Simple compositions
- Warm lighting
- Scenes with visible texture
- Slow or moderate camera movement
It can also work with modern urban footage, but heavy digital sharpening, neon colors, ultra-clean studio lighting and fast camera moves may need more careful treatment.
Create a Non-Destructive Setup
Use adjustment layers whenever possible. This lets you change the look later without permanently changing your original footage.
- Import your video into After Effects.
- Drag it into a new composition.
- Place the footage on the timeline.
- Go to Layer > New > Adjustment Layer.
- Rename the adjustment layer Aged Film Color.
- Add more adjustment layers as you build the effect.
A useful layer stack might look like this:
| Layer name | Purpose |
|---|---|
| Dust and Scratches | Moving dirt, specks and vertical marks |
| Gate Weave | Subtle frame movement |
| Flicker and Frame Rate | Exposure variation and motion changes |
| Grain | Film texture |
| Aged Film Color | Color, contrast, softness and vignette |
| Original Footage | Your clean video clip |
This structure keeps the project organized and makes it easy to turn individual parts on or off.
Step 1: Fade the Color
Digital footage often looks too clean and saturated for an aged film treatment.
Select your Aged Film Color adjustment layer and apply:
Effect > Color Correction > Curves
Start by lifting the black point slightly. This fades deep blacks and gives shadows a softer, less digital look.
Then lower the white point a little. This reduces harsh highlights.
Next, add:
Effect > Color Correction > Hue/Saturation
Lower the Master Saturation by around 10 to 30 points.
Use a small change first. Aged film can still have rich color. The goal is not to make everything gray.
Optional Color Directions
| Look | Suggested direction |
|---|---|
| Warm family film | Add slight yellow, orange and red warmth |
| Faded 1970s print | Reduce saturation, lift blacks and add yellow-green tones |
| Old black-and-white film | Use Tint or Black & White, then adjust contrast |
| Sepia archive look | Use Tint with dark brown shadows and pale cream highlights |
| Damaged horror film | Lower saturation, cool shadows and add dirty yellow highlights |
| Super 8 home movie | Add warm highlights, greenish shadows and stronger grain |
Color grading tutorials for vintage looks commonly reduce saturation, soften contrast and use curves or color controls before adding grain and texture.
Step 2: Add Subtle Softness
Older film is rarely as sharp as modern digital footage.
On the Aged Film Color adjustment layer, add:
Effect > Blur & Sharpen > Fast Box Blur
Try a Blur Radius between 0.5 and 2.0.
Turn on Repeat Edge Pixels.
Then add:
Effect > Blur & Sharpen > Unsharp Mask
Use a low amount, such as 20 to 60, to put back a little edge detail.
This combination may sound strange, but it helps remove the harsh digital edge without making the whole image blurry. A blur-and-sharpen combination is often used in old-film treatments to soften footage while keeping it readable.
Step 3: Add Film Grain
Film grain should move. A still grain texture sitting over footage can look like a cheap filter.
Create a new adjustment layer and call it Grain.
Apply:
Effect > Noise & Grain > Add Grain
In the effect controls:
- Set Viewing Mode to Final Output
- Choose a film preset if one fits your project
- Start with a low intensity
- Adjust grain size slowly
- Preview at full resolution before deciding
If Add Grain is too heavy for your project, use:
Effect > Noise & Grain > Noise
Start around 3% to 8%.
Turn off Use Color Noise if you want a more neutral black-and-white grain texture. Turn it on if you want a rougher color-film look.
Grain Settings to Try
| Film style | Grain strength | Grain size |
|---|---|---|
| Clean 35mm-inspired look | Low | Small |
| 16mm documentary look | Medium | Medium |
| Super 8 home-movie look | Medium to high | Medium to large |
| Distressed archive look | High | Large and uneven |
| Horror found footage | Medium | Medium, with extra dust and flicker |
Native After Effects workflows commonly use Add Grain on an adjustment layer and set its viewing mode to Final Output for a more realistic result.
Step 4: Create Film Flicker
Film flicker is a small, uneven change in brightness. It should feel irregular.
Create another adjustment layer and rename it Flicker.
Add:
Effect > Color Correction > Exposure
Alt-click or Option-click the stopwatch next to Exposure and use this expression:
javascriptwiggle(8,0.15)
This creates eight small brightness changes per second with a maximum variation of 0.15 stops.
For a stronger damaged-film look, try:
javascriptwiggle(12,0.3)
Do not go too far. Strong flicker can be unpleasant and may create accessibility issues for viewers sensitive to flashing images.
Safer Flicker Tips
- Keep brightness changes small.
- Avoid rapid full-white flashes.
- Use lower intensity on talking-head footage.
- Preview the effect at full speed.
- Test the video on a phone as well as a desktop monitor.
- Add a content warning if your final project contains deliberate intense flashing.
Step 5: Add Gate Weave
Gate weave is the slight movement of film inside a camera or projector gate. It makes the frame drift by a few pixels.
Create a null object:
Layer > New > Null Object
Rename it Gate Weave Control.
Parent your footage and all effect layers to the null. Then animate the null’s Position property.
Alt-click or Option-click the Position stopwatch and use:
javascriptwiggle(2,1)
This creates two small shifts per second, up to one pixel in each direction.
For a rougher Super 8 or damaged-film effect, try:
javascriptwiggle(4,2)
Keep it small. If the movement is obvious, it starts looking like handheld camera shake rather than mechanical film movement.
Tutorials that recreate old film commonly use small random vertical or positional movement to simulate vintage frame instability.
Step 6: Add Dust and Dirt
Dust needs to appear and disappear. The easiest realistic method is to use a licensed dust overlay.
Place the overlay above your footage and set its blending mode to:
- Screen
- Add
- Lighten
- Linear Dodge (Add)
Lower the opacity until the dirt is noticeable only when you look for it.
If you do not have overlays, you can build simple dust in After Effects.
Make Dust With Fractal Noise
- Create a new black solid.
- Name it Dust.
- Apply Effect > Noise & Grain > Fractal Noise.
- Increase Contrast heavily.
- Adjust Brightness until only a few dots remain.
- Add Levels if you need more control.
- Set the layer blend mode to Screen or Add.
- Lower the opacity.
- Animate Evolution or Offset Turbulence so the dust changes.
Start with settings like these:
| Fractal Noise setting | Starting value |
|---|---|
| Fractal Type | Dynamic Twist or Basic |
| Noise Type | Block or Soft Linear |
| Contrast | 800 to 2,000 |
| Brightness | 200 to 800 |
| Scale | 30 to 150 |
| Opacity | 10% to 35% |
For random dust movement, alt-click or Option-click Offset Turbulence and use:
javascriptwiggle(30,1000)
Fractal Noise can be used to create animated dust, with high contrast and brightness isolating specks before the layer is blended into the footage.
Step 7: Add Vertical Film Scratches
Film scratches are usually vertical because the film strip moves through a camera gate or projector.
Duplicate the Dust solid and rename it Scratches.
In Fractal Noise:
- Turn off Uniform Scaling.
- Make the width very small.
- Make the height very large.
- Increase contrast.
- Adjust brightness until only thin vertical streaks remain.
- Set the blend mode to Screen for pale scratches or Multiply for dark scratches.
- Lower opacity.
Scratch Settings to Try
| Setting | Starting value |
|---|---|
| Contrast | 3,000 to 10,000 |
| Brightness | 1,000 to 3,000 |
| Scale Width | 5 to 20 |
| Scale Height | 2,000 to 8,000 |
| Opacity | 5% to 25% |
Apply a slight Directional Blur at 90 degrees to make the scratches feel more natural.
Do not let scratches fill the entire image all the time. Animate opacity or cut the layer into short sections so the damage changes throughout the clip.
Step 8: Add a Vignette
A vignette darkens the edges of the frame and can suggest older lenses, film projection or simple optical falloff.
On the Aged Film Color adjustment layer, apply:
Effect > Stylize > CC Vignette
Start with a low amount.
Or create your own vignette:
- Add a black solid above the footage.
- Draw a large oval mask.
- Set the mask to Subtract.
- Increase mask feather heavily.
- Lower layer opacity to around 10% to 30%.
- Set the layer to Multiply.
A vignette should be almost invisible in the center of the image. If viewers immediately notice the dark circle, reduce it.
Step 9: Reduce the Frame Rate
Older film does not always need a lower frame rate. Standard sound film ran at 24 fps, which is still a normal cinematic rate.
But you may want reduced motion smoothness for a Super 8, stop-motion or heavily aged home-movie feel.
Create an adjustment layer named Frame Rate.
Apply:
Effect > Time > Posterize Time
Try:
- 18 fps for a stylized old-film feel
- 16 fps for rougher home-movie movement
- 12 fps for very damaged or experimental footage
- 24 fps if you only want a standard cinema feel
Posterize Time is commonly used in old-film effects to reduce motion smoothness and create a more vintage appearance.
Be careful with dialogue scenes. Reducing frame rate can make lip sync feel less natural.
Step 10: Add Film Burns or Light Leaks
Film burns and light leaks work best as occasional accents.
Use them for:
- A transition
- The beginning of a memory scene
- A montage
- A title reveal
- A scene change
- A music-video beat
Place a licensed overlay above your footage, set the blend mode to Screen or Add, and lower opacity.
Do not run a light leak for an entire five-minute video. It will look repetitive.
If you want to build a simple effect yourself:
- Create an orange or yellow solid.
- Add a large feathered mask at one edge.
- Animate mask position and opacity.
- Add a blur.
- Set blending mode to Add or Screen.
- Keep it visible for only a short time.
Step 11: Add a Film Frame Border
A rounded film-frame border can help sell the look, especially for Super 8 or home-movie content.
- Create a black solid.
- Use the Rounded Rectangle Tool to create a mask.
- Set the mask mode to Subtract.
- Increase corner roundness.
- Place the border above everything else.
- Lower opacity slightly if the border feels too harsh.
You can also create subtle sprocket holes, but use them carefully. They often make a video look like a template rather than real scanned film.
Step 12: Build a Reusable Aged Film Preset
Once you like the look, organize it.
- Select all aged-film layers.
- Pre-compose them.
- Name the pre-composition clearly, such as Aged Film 16mm Preset.
- Save the project as a template.
- Duplicate the pre-composition when starting a new project.
- Adjust grain, scratches, color and flicker for each new clip.
Do not expect one preset to work for every video. Bright outdoor footage, dark indoor footage and high-contrast footage all need different settings.
Quick Aged Film Settings
Use this as a starting point, then adjust to match your footage.
| Effect | Starting setting | Purpose |
|---|---|---|
| Curves | Lift black point slightly, lower white point slightly | Faded contrast |
| Hue/Saturation | -10 to -30 saturation | Less modern digital color |
| Fast Box Blur | 0.5 to 2.0 blur radius | Softer image |
| Add Grain | Low to medium intensity | Moving film texture |
| Exposure wiggle | wiggle(8,0.15) | Subtle flicker |
| Position wiggle | wiggle(2,1) | Gate weave |
| Dust layer opacity | 10% to 35% | Temporary dirt |
| Scratch layer opacity | 5% to 25% | Physical film wear |
| CC Vignette | Low amount | Edge falloff |
| Posterize Time | 18 to 24 fps | Older motion feel |
Choose a Film Style
Not every aged-film look should use the same settings.
Soft 35mm Film Look
Use this for a polished cinematic style.
- Low grain
- Slightly faded contrast
- Soft highlights
- Minimal dust
- Very subtle gate weave
- No frame-rate reduction
- Light vignette
16mm Documentary Look
Use this for a textured, natural and slightly rough look.
- Medium grain
- Reduced saturation
- Soft contrast
- Occasional dust
- Small scratches
- Mild gate weave
- Moderate vignette
Super 8 Home-Movie Look
Use this for family memories, travel montages and nostalgic footage.
- Warm color shift
- Medium-to-heavy grain
- Noticeable flicker
- Slight frame-rate reduction
- Gate weave
- Dust and occasional scratches
- Rounded-frame border, if appropriate
Damaged Archive Look
Use this for horror, historical recreations or distressed transitions.
- Stronger grain
- Faded or shifted color
- More scratches
- Short bursts of flicker
- Frame jitter
- Occasional film burns
- Lower frame rate only when needed
Common Mistakes
Adding Too Much Grain
Heavy grain can turn a good image into muddy compression noise.
Preview at 100% scale. If you cannot see faces, textures or text clearly, reduce the grain.
Making Dust and Scratches Loop Obviously
A repeating overlay can make the effect feel fake.
Use multiple overlays, offset them, reverse some clips, trim them, or animate their opacity.
Using Constant Strong Flicker
Constant flicker distracts from the story and may be uncomfortable to watch.
Keep it mild, uneven and limited to the moments where it supports the mood.
Confusing Camera Shake With Gate Weave
Gate weave is small and mechanical. Camera shake is larger and more physical.
If the frame moves several pixels in every direction, reduce the amount.
Making Every Shot Look the Same
Aged-film effects should react to the footage.
A bright outdoor shot may need less grain. A dark interior may need less contrast reduction. A close-up may need fewer scratches than a wide landscape.
Ignoring Audio
A vintage look can feel more convincing with subtle sound design.
Try:
- Projector hum
- Tape hiss
- Room tone
- Soft vinyl crackle
- Brief reel-change sound
- Muted high frequencies
Keep it low in the mix. Audio should support the visual effect, not become a distraction.
Export Tips
Before exporting, preview the video at full resolution.
Check for:
- Grain that looks blocky after compression
- Flicker that is too intense
- Scratches covering faces or titles
- Borders that crop important details
- Color banding in gradients
- Frame-rate changes that affect lip sync
- Effects that look different on a phone screen
For most online delivery, export through Adobe Media Encoder using H.264 or H.265 settings appropriate to the platform. Use a higher bitrate if fine grain and texture are important, because aggressive compression can remove or distort the aged-film details.
Frequently Asked Questions
How do I make digital footage look like old film in After Effects?
Use several subtle effects together: faded color, moving grain, dust, scratches, flicker, gate weave, softness and a light vignette. The effect looks more believable when each element changes over time.
What is the best grain effect in After Effects?
Add Grain usually gives more film-like control than basic Noise. Use it on an adjustment layer, set Viewing Mode to Final Output, and keep the intensity low enough that the footage remains clear.
How do I make a Super 8 effect in After Effects?
Use warm colors, stronger grain, gate weave, dust, subtle flicker and a reduced frame rate such as 16 or 18 fps. Add a rounded frame border only if it supports the style.
How do I add film scratches in After Effects?
Use a licensed scratch overlay or create a Fractal Noise solid with very narrow width, tall height, high contrast and low opacity. Blend pale scratches with Screen or dark scratches with Multiply.
What is gate weave?
Gate weave is slight image movement caused by film shifting in the camera or projector gate. In After Effects, you can recreate it by adding very small random position movement, such as wiggle(2,1).
Should I lower the frame rate for an aged-film look?
Only if you want a rough home-movie or stylized effect. Standard cinema film is commonly 24 fps, so a lower frame rate is not required for every old-film treatment. Posterize Time can create a rougher vintage motion style when used carefully.
Can I create an aged film look without stock overlays?
Yes. You can create grain, dust, scratches, flicker, vignettes and frame movement using native After Effects effects such as Add Grain, Fractal Noise, Curves, Exposure, Posterize Time and CC Vignette.
Final Thoughts
The best aged film look in After Effects is built from small imperfections.
Start with faded color and subtle grain. Then add gentle gate weave, uneven flicker, occasional dust and scratches. Reduce the frame rate only when it fits the style. Add film burns and borders as accents, not permanent layers.
Your footage should still be easy to watch. If the effect becomes more noticeable than the story, pull it back.