
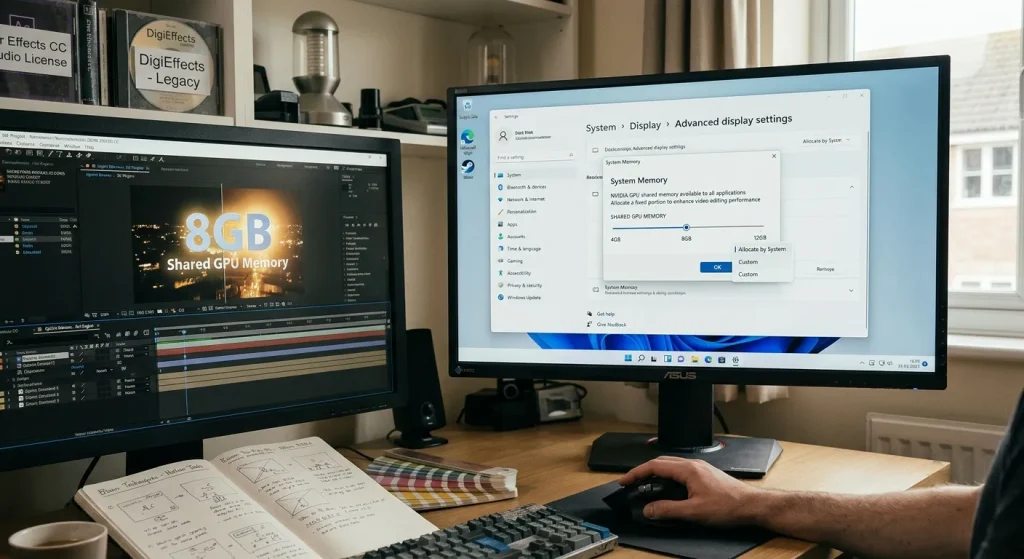
Windows automatically allocates up to 50% of your system RAM as shared GPU memory under the Windows Display Driver Model (WDDM). You cannot manually change this percentage for dedicated NVIDIA GPUs in Windows 10 or 11 settings. To increase shared GPU memory, you must install more system RAM or expand your Windows virtual paging file.
Understanding Dedicated VRAM vs. Shared GPU Memory in Windows
If you edit high-resolution 4K or 8K video in Premiere Pro, DaVinci Resolve, or After Effects, you have probably seen your system slow down or crash with an “Out of Video Memory” error. When your graphics card runs out of dedicated video memory (VRAM), your computer relies on shared GPU memory to keep your timeline playing.
To understand how your system handles heavy rendering loads, you need to know the difference between dedicated VRAM and shared GPU memory.
What is Dedicated VRAM?
Dedicated VRAM is physical high-speed memory built directly onto your NVIDIA graphics card (such as GDDR6 or GDDR6X). It sits right next to the graphics processor chip. Because it connects through a wide memory bus, dedicated VRAM moves data extremely fast.
Your editing software uses dedicated VRAM to store:
- Uncompressed frame buffers
- Color grading node trees
- Motion graphics templates
- Temporal noise reduction buffers
- AI depth maps and optical flow tracking data
When your project fits within your graphics card’s dedicated VRAM, scrubbing through your timeline stays smooth.
What is Shared GPU Memory?
Shared GPU memory is a chunk of your regular system RAM (DDR4 or DDR5) that Windows reserves as a backup pool for your graphics card.
When your NVIDIA card runs out of onboard VRAM during a heavy render, the Windows Display Driver Model (WDDM) spills the extra data over into your system RAM.
Key Technical Differences
| Feature | Dedicated NVIDIA VRAM | Shared GPU Memory |
| Physical Location | On the NVIDIA Graphics Card | On the System Motherboard (RAM) |
| Memory Speed | Very Fast (Up to 1000+ GB/s) | Slower (30 to 90 GB/s) |
| How It Is Assigned | Fixed by hardware manufacturer | Dynamic (up to 50% of system RAM) |
| User Manual Adjustment | Cannot be changed | Expands by adding more system RAM |
| Editing Impact | Primary storage for real-time playback | Emergency overflow to prevent crashes |
How Windows Handles Shared GPU Memory (WDDM Mechanics)
Windows 10 and Windows 11 use the Windows Display Driver Model (WDDM 2.0 through WDDM 3.2) to handle system resources.
Under WDDM, Windows sets a strict rule for dedicated graphics cards: 50% of your total physical system RAM is reserved as shared GPU memory.
Here is how that breaks down based on your installed physical RAM:
- 16 GB System RAM: 8 GB Shared GPU Memory
- 32 GB System RAM: 16 GB Shared GPU Memory
- 64 GB System RAM: 32 GB Shared GPU Memory
- 128 GB System RAM: 64 GB Shared GPU Memory
If you open Task Manager (Ctrl + Shift + Esc), click the Performance tab, and select your NVIDIA GPU, you will see three distinct numbers listed at the bottom:
- Dedicated GPU Memory: The physical VRAM on your card (e.g., 8.0 GB on an RTX 3070).
- Shared GPU Memory: Exactly half of your system RAM (e.g., 16.0 GB on a 32 GB system).
- GPU Memory: The combined total of Dedicated + Shared (e.g., 24.0 GB total pool).
Can You Manually Change NVIDIA Shared Memory in Windows?
Here is the plain truth: You cannot open NVIDIA Control Panel or Windows Settings and drag a slider to change the 50% shared GPU memory limit.
Windows hardcodes this 50% ratio at the kernel level for dedicated graphics cards. Neither NVIDIA driver updates nor registry tweaks will let you change that specific percentage split for dedicated GPUs.
However, if you are running out of memory during video edits, you can bypass this wall using four practical methods:
- Increase physical system RAM (which automatically expands the 50% pool).
- Increase Windows Virtual Memory (Pagefile) to prevent out-of-memory crashes.
- Adjust BIOS pre-allocation settings if you use a laptop with integrated graphics alongside an NVIDIA GPU.
- Reconfigure your video editing apps to use VRAM more efficiently.
Step 1: Increasing Total System RAM to Expand Shared GPU Memory
Because Windows fixes shared GPU memory at 50% of system memory, adding physical RAM sticks to your motherboard is the most effective way to give your GPU more headroom.
Example: 32 GB RAM Upgrade Path

[ 32 GB System RAM Installed ]
       │
       ├──► 16 GB for System & Editing Software
       └──► 16 GB Max Shared GPU Memory Pool

                  ▼ Add 32 GB RAM Module

[ 64 GB System RAM Installed ]
       │
       ├──► 32 GB for System & Editing Software
       └──► 32 GB Max Shared GPU Memory Pool
Recommended System RAM for Video Editors
If you regularly edit in Premiere Pro or DaVinci Resolve, match your RAM to your timeline resolution:
- 1080p Projects: 16 GB System RAM (8 GB Shared GPU Memory)
- 4K H.264 / HEVC Editing: 32 GB System RAM (16 GB Shared GPU Memory)
- 4K Uncompressed / RAW / 10-bit: 64 GB System RAM (32 GB Shared GPU Memory)
- 6K / 8K & Complex After Effects Work: 128 GB System RAM (64 GB Shared GPU Memory)
Step 2: Adjusting Windows Virtual Memory (Paging File)
When your dedicated VRAM fills up, your system relies on shared GPU memory. If your system RAM fills up too, Windows turns to its Paging File (virtual memory on your SSD) to prevent app crashes.
If your virtual memory limit is set too low, high-resolution timeline renders in Premiere Pro or DaVinci Resolve will crash immediately once VRAM and system RAM run out.
How to Adjust Your Virtual Memory in Windows 10 & 11
- Press the Windows Key, type
advanced system settings, and press Enter. - Under the Performance section, click Settings.
- Go to the Advanced tab and click Change under Virtual memory.
- Uncheck Automatically manage paging file size for all drives.
- Select your fastest NVMe SSD drive (usually your
C:drive). - Choose Custom size.
- Set Initial size (MB) to
1.5 x your total physical RAM(in MB). - Set Maximum size (MB) to
3 x your total physical RAM(in MB). - Click Set, then OK, and restart your computer.
Calculation Table for Pagefile Values
| Physical Installed RAM | Initial Size (1.5x) | Maximum Size (3x) |
| 16 GB | 24,576 MB | 49,152 MB |
| 32 GB | 49,152 MB | 98,304 MB |
| 64 GB | 98,304 MB | 196,608 MB |
Setting a custom pagefile size gives Windows a stable safety net, preventing memory dropouts during heavy timeline renders.
Step 3: BIOS/UEFI Settings for Laptops and Dual-GPU Systems
If you work on an editing laptop with an Intel or AMD integrated GPU alongside a dedicated NVIDIA GPU, your system uses a hybrid memory pipeline.
Integrated graphics chips borrow system RAM directly to function as VRAM. You can adjust the baseline RAM reserved for the integrated GPU inside your system BIOS.
How to Change iGPU Pre-Allocated Memory in BIOS
- Save your editing projects and restart your computer.
- As the screen turns black, tap Del, F2, or F12 repeatedly to enter the BIOS/UEFI setup.
- Switch to Advanced Mode (usually by pressing F7).
- Look for a menu named Advanced, Chipset Configuration, North Bridge, or System Agent.
- Locate settings named DVMT Pre-Allocated, UMA Frame Buffer Size, or Integrated Graphics Memory.
- Increase the value from default (
128MBor256MB) to512MBor2048MB(2 GB). - Save changes and exit (F10).
Note: Raising this value reserves system RAM specifically for display tasks. This leaves your dedicated NVIDIA GPU free to focus entirely on CUDA rendering in your editing timeline.
Managing VRAM in Adobe Premiere Pro & After Effects
Instead of forcing slow system RAM to act like VRAM, you can reconfigure Adobe Creative Cloud applications to manage your existing memory more efficiently.
1. Optimize Memory Allocation Settings
In Premiere Pro or After Effects, go to Edit > Preferences > Memory.
- Set RAM reserved for other applications to the lowest allowed number (usually 3 GB to 6 GB). This gives Adobe apps maximum system RAM to support shared GPU tasks.
- Change the Optimize rendering for dropdown from Performance to Memory if you experience mid-render crashes on complex timelines.
Preferences -> Memory
  ├── RAM reserved for other apps: Set to Minimum (3 GB - 6 GB)
  └── Optimize rendering for: Set to "Memory"
2. Enable Hardware Accelerated Decoding
Go to Edit > Preferences > Media.
- Ensure Enable hardware-accelerated decoding is checked.
- Restart Premiere Pro.
This forces your NVIDIA GPU’s dedicated NVDEC chip to handle video decompression, keeping your general shared VRAM free for color effects and scaling.
Managing GPU Memory in DaVinci Resolve
DaVinci Resolve relies heavily on GPU processing. If your timeline runs out of VRAM, Resolve will pop up a “GPU Memory is Full” error message and halt playback.
How to Fix VRAM Overflows in DaVinci Resolve
- Go to DaVinci Resolve > Preferences > System > Memory and GPU.
- Under GPU Processing Mode, change the setting from Auto to CUDA.
- Under GPU Selection, uncheck Auto and explicitly check your dedicated NVIDIA graphics card.
- Uncheck any integrated Intel or AMD graphics chips to prevent Resolve from sending frame buffers to slower system RAM.
DaVinci Resolve Preferences -> System -> Memory and GPU
  ├── GPU Processing Mode: Select "CUDA" (Manual)
  └── GPU Selection: Check NVIDIA Card / Uncheck Integrated GPU
Timeline Performance Adjustments
If you are working with 4K or 8K media on a GPU with 8 GB of VRAM or less:
- Open Playback > Timeline Proxy Resolution and set it to Half or Quarter.
- Go to Project Settings > Master Settings > Frame Processing and lower your timeline working resolution while editing, switching back to full resolution right before exporting.
Hardware Upgrades vs. Software Workflows
If you find yourself hitting memory bottlenecks regularly, you need to decide whether to upgrade your hardware or adopt a proxy workflow.
| Approach | Pros | Cons | Best For |
| System RAM Upgrade | Inexpensive; expands shared GPU memory pool instantly | Does not match dedicated VRAM speeds | Long timeline renders & multitasking |
| New NVIDIA GPU Upgrade | Maximum speed; fixes hardware VRAM caps | Higher cost; may require a new power supply | Heavy 4K/8K color grading & AI effects |
| Proxy Workflow | Free; makes editing smooth on older hardware | Requires setup time before editing | Editing high-bitrate RAW/H.265 media |
Recommended Software Deals & Discount Codes
If you rely on web-based editors or need quick AI processing alongside your main desktop NLE, using cloud tools can help offload processing from your hardware.
Here are current discounts on popular editing software:
| Tool | Features | Regular Price | Promo Code | Discounted Price |
| VEED.io Pro | Web Video Editor, Auto Subtitles, AI Voices | $30 / mo | EFFECTS50 | $15 / mo (50% Off) |
| DigiEffects Archive | Legacy Plugin Presets & Visual Effects Packs | $99 | DIGI20 | $79.20 (20% Off) |
Frequently Asked Questions (FAQ)
Why does Task Manager show my shared GPU memory at 50%?
Windows assigns 50% of your system RAM as shared GPU memory by design through WDDM. This gives your graphics card a fallback pool if onboard VRAM runs out. You cannot change this percentage manually.
Does increasing shared GPU memory speed up video rendering?
Not directly. System RAM runs much slower than dedicated VRAM (DDR4/DDR5 maxes out around 30 to 90 GB/s, while GDDR6X reaches over 900 GB/s). Shared GPU memory prevents your application from crashing, but offloading data to system RAM will slow down rendering.
Can I turn off shared GPU memory in Windows 10 or 11?
No. WDDM requires shared GPU memory to keep the Windows desktop interface running smoothly. It stays active automatically in the background.
What should I do if DaVinci Resolve says “GPU Memory is Full”?
Lower your timeline proxy resolution, clear your render cache under Playback > Delete Render Cache, remove heavy temporal noise reduction nodes, or upgrade your physical system RAM to expand your shared memory buffer.
Summary & Action Plan
You cannot drag a slider in Windows to adjust your shared NVIDIA GPU memory, but you can control how your hardware handles heavy rendering tasks.
If your video editor keeps crashing from memory limits:
- Upgrade your system RAM to 32 GB or 64 GB to automatically enlarge your shared GPU memory pool.
- Set a custom Windows virtual memory pagefile on your fastest NVMe SSD.
- Configure Premiere Pro or DaVinci Resolve to use CUDA acceleration and optimize memory allocation.
Following these steps will keep your system stable and prevent out-of-memory errors on demanding video projects.